|
|
Kickboard - Auto Calculate Length
Ordering kickboards is made simple by using the powerful, yet easy to use, Kick Board Auto Calculate Length option. After adding your cabinet, you can simply click on the kickboard that you want to add it to.
Here is how to do it:
-
Step: 1
Enter your first cabinet. Ensure that you enter a height for the kickboard that you want and also (to make life really easy for you later) enter a 'Kickboard Reference No.' (kickboard wall reference) - see image below called 'Step: 1 (Above) Add first Cabinet'.
-
Step: 2
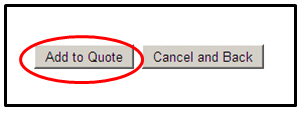
Then just add the cabinet to your quote, see image below called 'Step: 2 (Above) Add to Quote'.
-
Step: 3
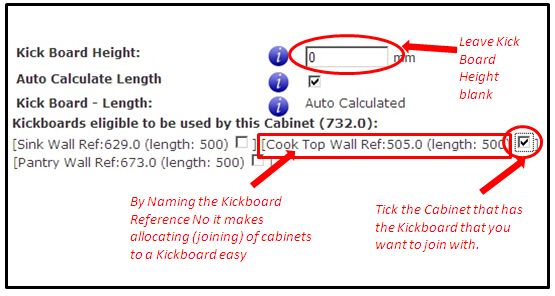
Add another cabinet. If this is the cabinet that you want the kickboard to join to the other cabinet that you entered, then simply leave the 'Kickboard Height' property at 0 (or leave blank) and click on the kickboard that you want to join to (tick box). It is as simple as that. See image below called 'Step: 3 (Above) Add to Quote'.
Note: The maximum length of a single length of kickboard is 2350mm. If you wanted to change the quantity to '3' cabinets, then this would mean that the overall length would equal 3000mm (which is too long for a single length of kickboard). What you would do here is just make the quantity as '2' (so the cabinets combined are 2000mm overall), then add another cabinet to your quote and enter the kickboard height in the 'Kickboard Height' property. This would simply create another length of kickboard, so when you install these together on-site, you would end up with one kickboard at 2000mm and another at 1000mm.
-
Step: 4
Add this cabinet to your quote, see image below called 'Step: 4 (Above) Add Another Cabinet'.
-
Step: 5
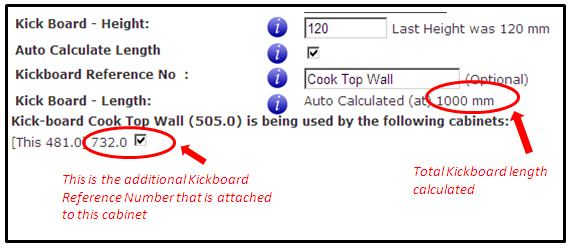
To view the cabinet that you have just joined the kickboard to, go back to the original cabinet (parent cabinet), and it shows you that this is linked to another (child) cabinet. You can add more than 1 cabinet to a (parent) cabinet kickboard. See image below called 'Step: 5 (Above) Check'.
We hope that this information has been helpful for you.
If you need further help or more information on this topic please:
|